Easy Toddler-Friendly Arts and Crafts Activities To Do At Home, Which Only Require Paint, Paper & Glue
If you’re like me and have a toddler to entertain at home, then this post might be helpful to you.
Over the last month my son and I have done some fun arts and crafts activities together. It keeps him engaged for 15 – 30 mins, which I have quickly learned in toddler world is pretty good!
Most of these activities only require paint, coloured paper and glue (and scissors to prep some material beforehand) and that really helps to keep things very simple for both you and your toddler. If you have extra resources at home such as brushes, crayons, stickers, glitter, googly eyes etc then by all means use them too. I have also added in notes where and how some of the activities can be extended.
The thing I like about all these arts and crafts is that they’re simple, fun and easy to break down into smaller steps. Get creative and free-flow with each of these activities — there are no rules!
Table of Contents
Using hand prints
After observing my son for a few days I realised at his current age of 2 years and 8 months he’s not really interested in using brushes and tools when it comes to exploring with paint; he’s much more keen on getting his fingers and hands to get messy. So I found some activities where we used his hand prints to base the artwork around and he really enjoyed it.
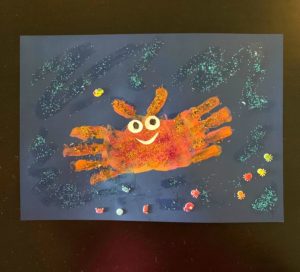
These hand print activities worked out great because I could also break them down into smaller steps and extend the activity. So the artwork was completed in multiple steps like below:
- Show my son pictures of different hand print activities and ask him to choose one
- Select paint colour and do hand prints / paint backgrounds (if needed) then wait for paint to dry
- Stick / add on details such as eyes etc — my son loved the glueing process
- Embellish with crayon, marker, stickers, pom poms, and glitter
My son also thoroughly enjoyed checking if his hand prints were dry and reporting back to me and asking when we can do the next steps. He really enjoyed embellishing his artwork with stickers and glitter.
Using tissue boxes / shoe boxes / paper plates / tissue rolls
This is a great way to use up recycle and reuse resources around the house. I collected any empty boxes, tissue rolls, paper plates etc I found around the house and keep them stacked near my son’s little “art supplies” corner. Any time I feel like my son is getting bored or moody, I’ll quickly reach for one of the resources and we’ll do a quick activity together. Again, it’s all about engagement and fun. Here’s a few we did together that my son enjoyed:
Tissue Box Monster
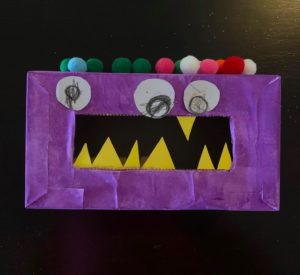
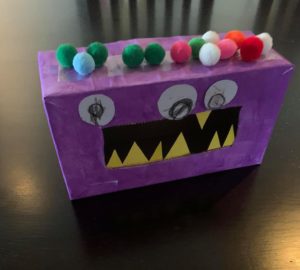
I covered an empty tissue box in white paper and helped my son paint it first. Then we cut out some scary teeth and stuck them on the opening of the tissue box and added some crazy eyes that he coloured in too. And the final touch is spooky pom pom hair stuck down on a strip of double-sided sticky tape.
Tissue Roll Monster
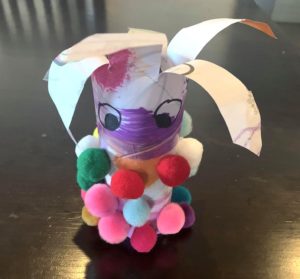
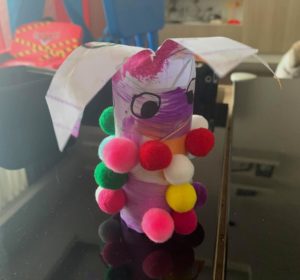
Another version of creating a monster using old tissue rolls instead. I asked my son to paint and make marks on paper and let it dry before I stuck it all around the roll. I drew on some eyes and cut the extra paper length into crazy hair. And then my son went to town adding pom poms all over on double-sided tape, which was taped all around the roll.
Shoe Box Bus
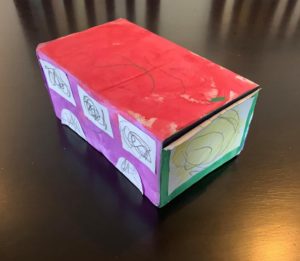
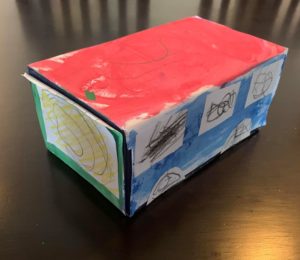
This is another easy activity using a shoe box (I used a small kid’s shoe box), covered in paper and painted in different colours. We added some windows and wheels on which my son scribbled and then helped to glue on.
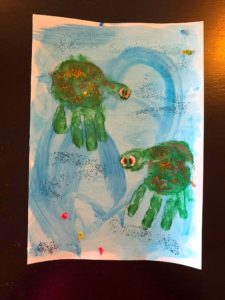
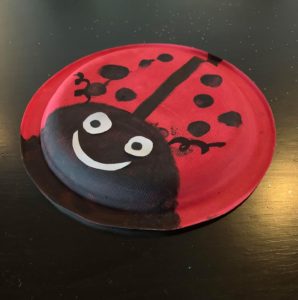
Paper Plate Ladybird
 A cute and easy activity to breakdown into several steps:
- Paint red background all over and let dry
- Add black details, use fingers / thumbs for spots
- Stick on eyes and smile
Reading a story or watching a video about ladybirds is a great extension to this activity too. I showed my son a video with the story ‘The Very Lazy Ladybird’ by Eric Carle and he loved it.
Using coloured paper & paper cut outs
Paper cut out sail boat
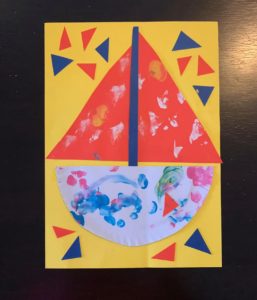 This activity is more focused on glueing and sticking. I cut out all the shapes in advance and helped my son put it together:
- Two large triangles for the sail
- One narrow vertical strip for the mast
- One semi-circle for the boat (you can also use a paper plate for this)
- Optional: use paper scrap and paint to decorate further
Paper cut out car
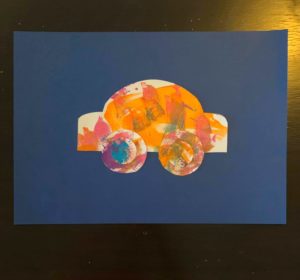
There are two variations of using cut outs.
The first one is a really easy activity. Simply search online for a template of your kid’s choice to trace and cut out. My son made marks with a dish sponge and finger prints and let dry. Stick the pieces together on coloured paper and voila — mounted artwork!
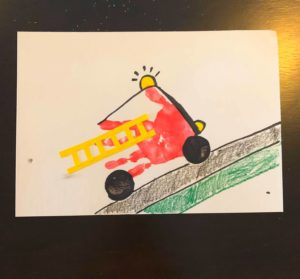
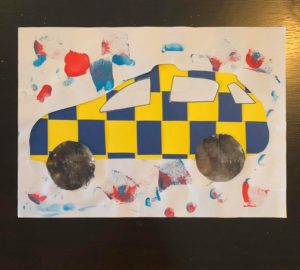
The second one is the inverse of the first activity in concept. It’s a bit more complex and requires more effort from you — the parent.
- Search for cut out template online (the one above is a police car) and cut out the pieces i.e. car body which is where the background peeks through, windows and wheels to stick on later
- Mount the white cut out paper on colour paper or create background of your choice. Here I weaved blue and yellow paper together to create a checkered effect.
- Paint / decorate the white paper
- Stick on wheels and window ‘
Using egg crates
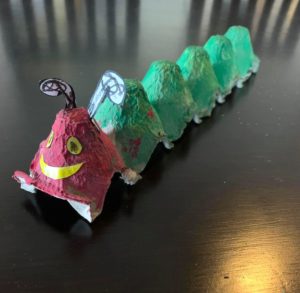
It turns out if you turn an egg crate upside down, it can be a lot of things!
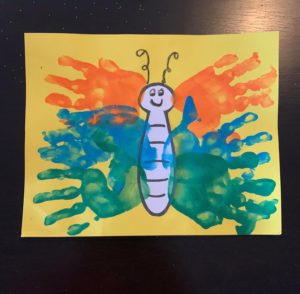
The caterpillar is inspired by Eric Carle’s famous ‘The Very Hungry Caterpillar’ character. It’s one my son recognises so I read him the story beforehand (activity extension!) and then discussed how we’re going to make a caterpillar. We used sponges to dot paint red and green paint to create the caterpillar’s body. I also created eyes, a smile and antennae, which my son coloured in with crayon before sticking them on to complete the craft.
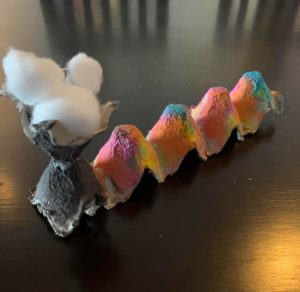
The train activity my son really enjoyed because it’s more free-flow and fun. Again, we used sponges to paint the “engine” black and “carriages” in multicolours. To create the engine I stuck a single egg crate section the right way up on top to create the chimney where “smoke” puffs out. The final touch is adding cotton balls as the “smoke”.
I think it’s important to remember that toddlers don’t focus for too long in one stretch so breaking the activities down into smaller steps helps a lot. They also get distracted easily and wander off (a lot!) and need a lot of assistance with the arts and crafts. So while these activities are targeted at toddlers, they definitely need you to be involved. At the end of the day it’s about having fun together and the end result doesn’t really matter.
I hope you found this post helpful. Please share any ideas you have in the comments below.